Friday, March 27, 2015

Binding and Finishes

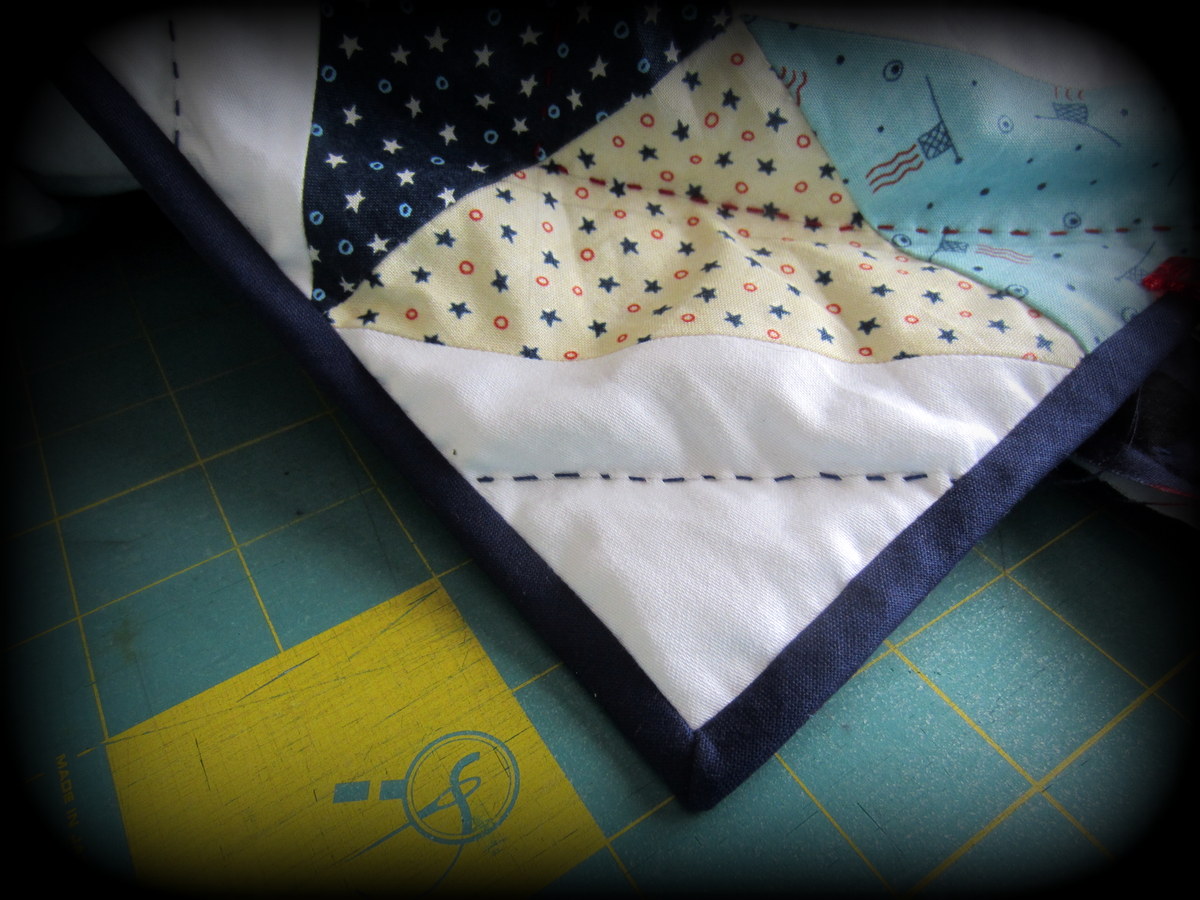
I have always enjoyed the binding process when making a quilt.  I have heard many quilters say they just hate it.  So this week as I trimmed up my patriotic chevron quilt and made my binding I started to wonder why I enjoyed it when others do not.  I know many quilters love the start of a new project, and although the thought of working with new fabric and a different design can be exciting.  I have always loved the finishes more!  The binding process is the time in the process where I reflect back on all the processes it took to make the quilt. The memories that I will always associate with this particular quilt.   Part of it also has to do with my need for neatness.  I can't say that my sewing area is pristine, and perfect. In fact there are days especially when I am piecing that fabric and thread can be found everywhere. But, when the day is done I always take a few minutes to tidy up.  When I am hand quilting I love the look of my quilt being framed by the hoop.  So lovely! But those raw edges with batting and uneven fabric with bits of thread is just so annoying.  I know some quilters will wrap the backing around to cover the exposed batting, but I am generally too excited to put in some stitches to take the time to do that  So, when it is time to bind and cut off the ugliness, it is a time to rejoice and and prepare for another wonderful finish! So that binding is like the beautiful ribbon on a package.  It needs to have just as much effort put into it as the rest of the quilt.
I remember my first binding. I wrapped the backing around to the front of the quilt. Boy, I had no idea what I was doing then.  Look at this corner!


Now I only use bias binding as it lays so nicely.  I have gone over the years from starting with a two and half inch strip down to a  two inch strips for my binding. A nice thin binding that is full just looks so much nicer to my eye. No more ugly corners, but neat and tidy miters that don't distract the eye, but frame the quilt nicely.  So while starting a new quilt is exciting for some, I really prefer the finishes!  It is a time to rejoice over another successful quilt!


Sunday, March 22, 2015

Slow basting Stitches!


If you follow along on my blog, you know that I have finally started my  Tribute To GW (George Washington) quilt. It has been floating around in my head for quite awhile. It started with wanting to do an eagle applique block, some George fabric and feeling the need to get these ideas out of my head.    So today, I am starting to do some back basting on my eagle block.  I am starting with some red stripes for the flag!


This afternoon I finished one end of my patriotic chevron quilt.  I am big stitching 29 lines across the quilt and I have 17 complete with only 12 more to go. Over half way in a week! This quilt measures 72X72 so big stitching is definitely a way to get something done pretty quickly.


I will have my TATW quilt nearby and if I find enough energy it would be nice to  finish row 17.  It is half way complete as you can see in the picture.  Last night I had to stretch out my arms to fold it up, so it is starting to really grow.  I just love this project, each new fabric added changes it's look and it is a great way to use up some old fabrics in my stash.


Wednesday, March 18, 2015

Plans bashed!

Since I got the birthday quilt basted last week, the plans were to put on the walking foot and do some straight machine quilting on it.  What could be more simple than using the markings on the foot to follow the chevrons and get this quilt finished.  I cleared the sewing table, filled a bobbin or two and then setttled down for some nice easy machine quilting.  STOP STOP STOP, that is not what happened. I started yes, but t was not nice or easy.  This is the largest quilt that I have tried to machine quilt. The weight of it really was overwhelming.  Of course trying to make a straight line is very difficult as the weight of the quilt can easily cause a blurp in that lovely straight line you are trying to quilt.  I only got about 24 inches into the quilt and lifted my presser foot and yanked it out from under the foot!  Quilting for me has always been about a pleasurable experience and this was not going to be.  So what does one do?  Of course do something that makes you happy. Since I had purchased some perle cotton to add a few hand quilting stitches to the machine quilting, why not just big stitch it.


I got off to a good start, I was having so much fun in fact that I got five lines of hand quilting done all across the quilt on the first day of stitching!  Only 24 more to go and this quilt will be finished and ready for gifting.  The best part is I am having a great time and really love of the look of those big stitches on this quilt!

Sunday, March 15, 2015

Just need some slow stitches!

I finished the patriotic chevron quilt that I have been working on the last week or two and have it sandwiched and pin basted ready for some machine quilting.  Then I wondered about having something to do in the evenings as I unwind from the day.    Oh yes, that back burner TATW!  I have about a dozen more squares to add to finish row 17.  So, I cut up enough 2 inch squares for four more rows.  


Last year, I won some George Washington fabric from  Julierose. I thought it would be neat to do a tribute quilt to our first president. I could incorporate an appliqued eagle block that I have been wanting to do for close to a year.  This quilt has been rolling around in my head for at least six months.  I have been struggling with how I will put them all together in one quilt.  Then I saw a post on FB that Bonnie Hunter shared with a multi-sized block layout.  That was it!  That was the answer to my prayers.  I just need to start the process of making the parts.  Part of my plan was to incorporate some embroidered blocks.  So between hand piecing and embroidery I have plenty of slow stitching to enjoy today. I am linking up with Kathy today who has a great post about relaxing slow stitches.   I am so glad my stress over how to approach my Tribute to George quilt is over, and now the relaxing process of stitching can begin!


Wednesday, March 11, 2015

Machine Time

I have spent a lot of time behind the machine the past few days.  After making all 324 HST's it was time to start assembling the quilt.  Do any of you watch Bonnie Hunter's quilt cam or follow her blog. She is such a great promoter of quilting. I find most of her advice is spot on. She assembles her quilt using a method calling webbing. I thought it might be helpful to web this quilt as it is crucial to get all the blocks the right direction and since it is a scrappy quilt I didn't want to mix up the rows as I added them to the quilt.  It would have been very helpful to have a design wall, but again the design floor is what I used.


After I laid out all the HST's it was just a matter of picking up a row and stitching each HST to the one to it's left in the quilt.  You end up with vertical rows that are webbed together by thread.  Once this completed you just pin the intersections in the other direction and stitch each horizontal row. It went quite well but I wondered if it had been easier if I would have done a quarter of the quilt at a time, but after thinking about it I probably would have turned something the wrong way.

Nesting seams as I go!


Next I nested the seams to get the horizontal seams stitched.  The rows really lined up well and I feel my accuracy has improved. Not there is perfection, after all I am a realist!   So the machine quilting can begin.  I want to add a few rows of big stitching  to this one, so I ordered some perle thread #12 to try in two different colors. Not sure if that is what will happen as time will tell.


Pin basted and ready for some quilting!

Sunday, March 8, 2015

Time for binding!

Even though I lost that hour of time this weekend as we turned our clocks ahead, I was able to fit in the final big stitches  to finish my RSC 2014 Pickle Dish quilt.  I usually name my quilts but this one just remains my pickle dish.  I am very pleased with how the big stitching on this turned out. It is such a graphic quilt and the big stitching just emphasizes it.  The backing on this quilt was a piece of fabric that my mom treasured for years.  She grew up in Austria and lived thru WW2 and lived a very frugal life.  It reminds me of a head scarf she used to wear.  It is a bit bohemian in my book and so I thought it really was a great fit as the backing to my pickle dish quilt.


To finish it off I added a  polka dot binding.  Now to add those final stitches to hold the binding down. I always enjoy those final stitches. A time to reflect the journey of making this quilt.  It definitely is a bit outside the norm for me.  But, it was fun to play with the bright fabrics and the bold graphic design in this quilt. Hopefully, I can then turn my attention to my TATW project. It has been a bit neglected and needs some attention. Working on round 15, each round taking a bit longer! It is fun to see how each round changes the quilt. I am using fabrics from my stash that just never seem to make it out of the closet, so the combinations are down right crazy.  Still, I am loving it more with each round. So I hope you will enjoy some slow stitches today and come join the other slow stitchers at Slow Stitching Sunday.

polka dot binding

backing fabric

Ready to start stitching!


Friday, March 6, 2015

WIP Be Gone

I am turning the final corner on my RSC2014 pickle dish quilt!  My hopes were to finish this quilt over the weekend,  I had high hopes of finishing the last three pickles this afternoon. But, my husband slipped on the ice this am and came home from work about 10 am and you know how that goes.


Well, I can't blame all of this on my husband, after all for some reason when I get close to finishing I often start procrastinating!  I have never really figured out why, it's not like it is the last quilt I will ever make ! Geez,! There are already four in process so that can't be it.  Do you ever start procrastinating?  So my solution is to link up with WIP Be Gone and put in my ear buds and do some stitching. I can still make my goal if I get to it!

Wednesday, March 4, 2015

Perfecting my Piecing!

Accurately cutting, sewing and pressing! Sounds doable!  Well we shall see!  I bought a new rotary cutter last week. They were on sale and I decided my other one has to be close to 15 years old. I like to use old blades to trim my paper pieced blocks so it would be nice to have two and not have to switch out blades.  Oh, I am so glad I did. I didn't get anything fancy, just a plain fiskar but it glides so much more smoothly. I think years ago I may have lost a little washer in my old cutter, could that be the difference?  So I am hoping the new rotary cutter gives me some new confidence as I approach this adventure.

My first step is to layer a 10 inch white and 10 inch print right sides together.  I then give them a spritz of starch and press.  I love cutting thru starched fabrics and find pressing them together helps keep the pieces lined up.  I used Jenny Doan's tutorial to make the HST's for the last chevron quilt I made. I just didn't like that the outside edges were bias. So since I am using a layer cake, I decided to use the cutting guide on the back of the layer cake to make my triangles.  First I marked the layered squares.  Four lines, two corner to corner and two across the center of the 10 inch square which gives me 8 half square triangles.

Time to start cutting!

After cutting on those lines, I am marking a 1/4 inch seam line on each triangle. This is something hand piecers to do to insure their seam is the correct size. This is not something I will  do for every quilt, but I am using them as training wheels here.


Let the stitching begin! Part of my plan is that I only make 32 triangles at any one session behind the machine. Hopefully, this will keep me focused on doing a great job.  I am using my quarter inch foot and turning down the speed on my machine. This is not a marathon, this is about paying attention. So I carefully feed the triangles thru after making sure they are perfectly matched. I am letting the machine pull them thru, trying to avoid any tugging or pulling. I am being careful to keep the piece lined up all the way thru to the end. Once they are stitched, I am pressing the seams open to help with eliminate bulky seams coming together and hopefully help with accuracy. Next, since I used a scant 1/4 inch I can take a ruler with a 45 degree line and line it up with the seam and trim off dog ears and make them a perfect 4.5 inches.
Trimming!


Dog ears trimmed a nice looking 4 1/2 inch unfinished block! 

I need 324 of these and then I can lay them out and start stitching them together.


Monday, March 2, 2015

Patriotic Chevron!

My daughter in law Laura, has a birthday coming up!   Her new patio furniture looks so nice and I thought she might enjoy having a quilt to enjoy when the weather is cooler.   Her cushions are off white and she has a few throw pillows in red and blue.   I thought a red/white and blue quilt might look nice.  As luck would have it,  I came across a fabric line by Sandy Gervais called Red, White & Free.


Isn't it a beautiful line?  It seemed to fit the bill, and so I got out my calculator to figure things out. To get the great variety  this quilt line offers and not have a lot of scraps left over, I decided to try using some precuts.  I definitely wanted to do something simple and chevrons always seem to be a hit, so why not.  I could easily pair up each 10 inch square with a white solid 10 inch square and make eight half square triangles out of each and end up with 336 half square triangles. I need four hst's for each block.  Each block would finish at 8 inches.    Simple math tells me that is 84 blocks.  I love square quilts so why not a 9 X 9 block quilt using 81 blocks?  Yeah that works!

If  you remember right, I am not the greatest piecer and it isn't that I don't try but somehow things just go wrong.  It was time to be honest with myself and reassess why things happen.  I get bored after about an hour of piecing. That's a easy  fix!  Am I cutting accurately?  Is my scant quarter inch really spot on? Do I distort when I am pressing? Do I check my block size after I make it?  Seems like a lot of work, but rather than be unhappy with my piecing skills I think it is time to do something about it. I have heard all the great tips and steps, now it is time to implement them! Wish me luck!


Sunday, March 1, 2015

Big Stitching Progress

Not much time has been spent behind the hoop this week. I have focused most of time on a  new projects, more about it later.  But with big stitching, it doesn't take much time to make some progress. I have completed the center of this quilt and started to stitch the last round of pickle dishes. So today, I hope to focus on my hand work and complete a few more pickles.


I also added an inner border to my compass quilt.  I am machine piecing this quilt, but love that there are elements of it that will use some hand stitches.  I love having several techniques going so that my hands don't get stressed by one technique.  So, after a few hand quilting stitches I hope to get a good start on adding some applique stitches to attach these circles to the border. Hope you can enjoy some slow stitching today!